
Installing a CCTV HD camera involves several steps to ensure proper functionality and optimal security coverage. Here's a general outline of the installation process:
i. Site Survey and Planning:
Assess the area where you want to install the cameras. Identify key
areas that need coverage such as entry points, blind spots, and hightraffic
areas.
Determine the number of cameras needed and their optimal placement for
maximum coverage.
Plan the positioning of the cameras to ensure they have a clear line of
sight and cover the desired areas without obstruction.
ii. Selecting Equipment:
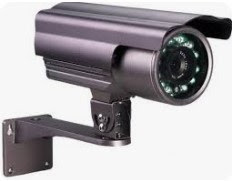
Choose high quality HD CCTV cameras that meet your specific requirements
such as resolution, field of view, night vision capabilities, and weather
resistance.
Select appropriate mounting brackets or housings for the cameras based
on the installation environment (indoor or outdoor).
iii. Gathering Necessary Tools and
Equipment:
Ensure you have all the tools required for installation such as drills,
screwdrivers, cable cutters, ladder, and power tools.
Gather additional equipment including cables, connectors, power
adapters, and a monitor or recording device if necessary.
iv. Installing Cameras:
Mount the cameras securely in their designated locations using mounting
brackets or housings.
Ensure the cameras are positioned at the correct angle to capture the
desired area of surveillance.
Connect the cameras to power sources and test their functionality.
v. Routing Cables:
Plan the routing of cables from the cameras to the monitoring or
recording device.
Use cable conduits or raceways to protect and conceal the cables,
especially in outdoor installations.
Secure the cables along walls or ceilings using cable clips or staples
to prevent them from being damaged or creating tripping hazards.
vi. Connecting Cameras to the
Recording Device:
Connect the camera cables to the recording device such as a DVR (Digital
Video Recorder) or NVR (Network Video Recorder).
Ensure proper connections between the cameras and the recording device,
following the manufacturer's instructions.
vii. Configuring Settings:
Access the camera's settings via a web interface or software provided by
the manufacturer.
Configure parameters such as resolution, frame rate, motion detection
sensitivity, and recording schedules according to your preferences and
requirements.
viii. Testing and Adjustments:
Test each camera to ensure it's functioning correctly and capturing the
intended area.
Make any necessary adjustments to camera angles, settings, or cable
routing to optimize performance.
Verify that the recording device is capturing footage from all cameras
and playback is functioning as expected.
ix. Finalizing Installation:
Secure all connections and cables to prevent tampering or accidental
disconnection.
Label cables and cameras for easy identification and maintenance.
Provide training to users on how to operate the system and access
recorded footage if necessary.
x. Regular Maintenance:
Schedule periodic maintenance checks to ensure cameras are clean, cables
are intact, and the system is functioning properly.
Update firmware and software as needed to address security
vulnerabilities and improve performance.


0 Comments