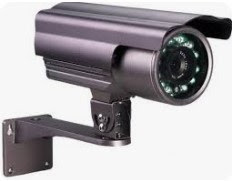
Installing CCTV Cameras Using Video Baluns and Network Cables can be a cost-effective and efficient way to set up a surveillance system. Video baluns allow you to transmit video signals over long distances using standard network cables (Cat5e or Cat6). Here's a general guide on how to install CCTV cameras using video baluns and network cables:
Things Needed:
1. CCTV cameras
2. Video baluns (transceivers)
3. Network cables (Cat5e or Cat6)
4. Power supply for cameras
5. Power supply for video baluns (if
required)
6. BNC connectors (optional,
depending on the type of video balun)
7. Screwdrivers, drill, and other
basic tools
8. Monitor or DVR for video recording
(if not using a network setup)
Steps:
1. Prepare the CCTV Cameras:
Ø Ensure that your
CCTV cameras are in working condition.
Ø Connect the
cameras to their power supply.
2. Prepare Video Baluns:
Ø If your video
baluns require power, connect them to a power supply.
Ø Make sure the
video baluns are compatible with your CCTV cameras.
3. Prepare Network Cables:
Cut network cables to the desired
lengths, considering the distances between the cameras and the monitoring
station.
4. Connect Video Baluns to Cameras:
Ø Connect the
video baluns to the CCTV cameras using the appropriate cables.
Ø If your cameras
use BNC connectors, connect the video baluns accordingly.
5. Connect Video Baluns to Network
Cables:
Ø Connect one end
of each network cable to the video baluns.
Ø The other end of
the network cables will be connected to the monitoring station or DVR.
6. Route Cables:
Ø Carefully route
the cables from the cameras to the monitoring station, keeping them organized
and hidden if possible.
Ø Use cable clips
or conduits to secure and protect the cables.
7. Connect Network Cables to
Monitoring Station or DVR:
Ø Connect the
other end of the network cables to the monitoring station or DVR.
Ø Make sure to
connect each cable to the correct input or channel.
8. Power Up the System:
Ø Power up the
CCTV cameras and the video baluns.
Ø Check the
monitoring station or DVR to ensure that the cameras are recognized and the
video signal is coming through.
9. Adjust and Test:
Ø Adjust the
cameras to the desired angles and positions.
Ø Test the system
to ensure that the video feed is clear and stable.
10. Secure and Seal Connections:
Once everything is working correctly, secure
the connections and, if necessary, seal them to protect against weather
conditions.
Remember to follow the specific instructions
provided by the manufacturer for your CCTV cameras and video baluns.
Additionally, adhere to any local regulations or guidelines regarding the
installation of surveillance systems. If you're unsure about any aspect of the
installation, consider consulting with a professional installer.


0 Comments