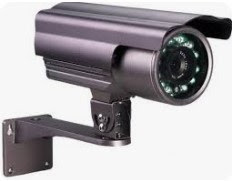
Installing IP Cameras Using a Power over Ethernet (PoE) Network Video Recorder (NVR) is a straightforward process. Here's a step-by-step guide to help you with the installation:
1. Gather Equipment: Make sure you have all the necessary
equipment including IP cameras, PoE NVR, Ethernet cables, power adapter for the
NVR (if required), and a monitor.
2. Plan Camera Placement: Determine the locations where you
want to install the IP cameras. Consider factors such as coverage area, angles,
and accessibility for running cables.
3. Connect Cameras to NVR: Plug one end of an Ethernet cable
into the PoE port on the NVR, and the other end into the PoE port on the IP
camera. Repeat this process for each camera you're installing.
4. Power Up NVR: Connect the NVR to a power source
using the provided power adapter. Turn on the NVR and wait for it to boot up.
5. Configure NVR Settings: Access the NVR's user interface
using a monitor connected to it. Follow the manufacturer's instructions to set
up basic network settings such as IP address, subnet mask, gateway, etc.
6. Discover Cameras: Once the NVR is connected to the
network, it should automatically detect the IP cameras connected to it via the
PoE ports. If not, you may need to manually add the cameras using their IP
addresses.
7. Configure Camera Settings: Access the NVR's interface and
navigate to the camera settings. Here, you can configure various parameters
such as resolution, frame rate, motion detection, etc., for each camera.
8. Mount Cameras: Securely mount the IP cameras in
their designated locations using appropriate mounting hardware. Ensure the
cameras are positioned correctly for optimal coverage.
9. Test System: After mounting the cameras, test the
system to ensure everything is working as expected. Check the live feed from
each camera on the NVR's interface to verify proper installation.
10. Fine-tune Settings: Adjust camera settings as needed to
optimize performance and ensure desired functionality. This may include
adjusting camera angles, sensitivity of motion detection, and configuring
recording schedules.
11. Remote Access (Optional): If desired, set up remote access to
view the camera feeds from a computer or mobile device. This typically involves
configuring port forwarding on your router and setting up a dynamic DNS service
if you don't have a static IP address.
12. Maintenance: Regularly check the system for any
issues such as loose connections, camera malfunctions, or storage capacity
issues. Perform firmware updates as recommended by the manufacturer to ensure
the security and reliability of the system.
By following these steps, you should be able to install IP
cameras using a PoE NVR efficiently and effectively. If you encounter any
difficulties during the installation process, refer to the user manual provided
by the manufacturer or seek assistance from technical support.


0 Comments