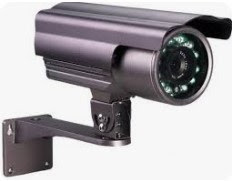
Installing a Smart Wi-Fi IP CCTV Camera involves several steps. Here's a general guide to help you through the process:
1. Choose the Right Location: Decide where you want to install the
camera. It should have a good view of the area you want to monitor, such as the
front door, backyard, or any other vulnerable spot.
2. Check Network Strength: Ensure that there is a strong Wi-Fi
signal in the area where you plan to install the camera. Weak Wi-Fi signals can
lead to connectivity issues.
3. Install the Camera Bracket: Most Wi-Fi IP cameras come with
mounting brackets. Use screws and anchors to securely attach the bracket to the
wall or ceiling.
4. Power Source: Determine how you will power the
camera. Some cameras come with rechargeable batteries, while others require a
constant power source. If you need to connect it to a power outlet, make sure
it's within reach or consider using extension cords.
5. Connect to Wi-Fi: Follow the manufacturer's
instructions to connect the camera to your Wi-Fi network. This usually involves
using a mobile app provided by the camera manufacturer. You'll need to input
your Wi-Fi network name and password.
6. Positioning and Alignment: Adjust the camera to the desired
angle and make sure it's pointing in the right direction. Most cameras allow
you to adjust the angle manually or through the mobile app.
7. Configure Camera Settings: Use the mobile app to configure
camera settings such as motion detection sensitivity, recording options,
notifications, and more.
8. Test the Camera: Once everything is set up, test the
camera to ensure it's functioning properly. Check the live feed on your mobile
device and verify that you're receiving notifications if motion detection is
enabled.
9. Fine-Tune Settings: Make any necessary adjustments to
the camera settings based on your testing. This may include tweaking motion
detection sensitivity or adjusting the camera angle.
10. Security Measures: Change the default username and
password for the camera to enhance security. Regularly update the camera's
firmware to protect against potential vulnerabilities.
11. Additional Features: Explore any additional features
offered by the camera, such as cloud storage for recordings, two-way audio
communication, or integration with other smart home devices.
12. Maintenance: Periodically check the camera for
any issues such as dirt or obstructions that may affect its performance. Clean
the lens and housing as needed.
By following these steps, you should be able to successfully install a smart Wi-Fi IP CCTV camera and enhance the security of your home or business. If you encounter any difficulties, refer to the manufacturer's instructions or seek assistance from their customer support.


0 Comments