
Setting up and Testing a CCTV camera System involves several steps, including installing the cameras, connecting them to a recording device, configuring the settings, and testing the system to ensure everything is functioning properly. Here's a step-by-step tutorial to guide you through the process:
Step 1: Planning and Placement
i. Survey the Area: Determine the areas you want to
monitor and the best locations for camera placement. Consider factors like
coverage area, lighting conditions, and potential obstructions.
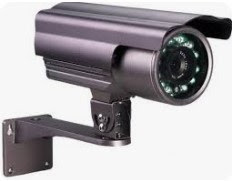
ii. Select Cameras: Choose the appropriate types of
cameras for each location based on factors such as indoor or outdoor use,
resolution requirements, and special features like night vision or motion
detection
iii. Mounting: Install the cameras securely using
appropriate mounting hardware. Ensure they are positioned at the correct angles
for optimal coverage.
Step 2: Camera Connection
i. Power Supply: Connect each camera to a power
source using the provided power adapters or a centralized power supply unit if
applicable.
ii. Video Connection: Connect the video output of each
camera to the video input of the recording device (DVR/NVR) using coaxial
cables or Ethernet cables, depending on the camera and recording device type.
Step 3: DVR/NVR Setup
i. Connect DVR/NVR: Connect the DVR/NVR to a monitor or
TV screen using HDMI or VGA cables. Power on the DVR/NVR and follow the
on-screen prompts to set up basic system settings like language, date, and
time.
ii. Hard Drive Installation: If the DVR/NVR has internal storage,
install a hard drive according to the manufacturer's instructions.
iii. Network Setup: Connect the DVR/NVR to your network
router using an Ethernet cable for remote viewing and access. Configure network
settings as required.
iv. Camera Configuration: Access the DVR/NVR's interface via a
web browser or dedicated software. Add each camera to the system and configure
settings such as recording mode, resolution, motion detection, and scheduled
recording.
Step 4: Testing
i. Camera Alignment: Adjust the camera angles and focus
as needed to ensure clear images and proper coverage of the monitored area.
ii. Video Playback: Test recording and playback
functions to verify that the cameras are capturing footage correctly.
iii. Motion Detection: Test motion detection settings by
walking through the monitored areas and observing if the cameras detect motion
and trigger recording.
iv. Remote Access: Test remote viewing and access from
a computer or mobile device to ensure you can monitor the cameras from anywhere
with an internet connection.
v. Night Vision: If applicable, test the night vision
capabilities of the cameras in low-light conditions to ensure clear footage.
Step 5: Final Setup and Maintenance
i. Finalize Configuration: Once testing is complete, make any
final adjustments to settings and configurations as needed.
ii. Documentation: Document the camera locations,
settings, and any other relevant information for future reference.
iii. Regular Maintenance: Schedule regular maintenance tasks
such as cleaning camera lenses, checking cables for damage, and updating
firmware/software to keep the system running smoothly.
By following these steps, you can set up and test a CCTV
camera system effectively to ensure reliable surveillance of your premises.


0 Comments