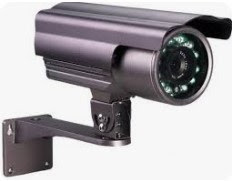
Installing a Wi-Fi Smart Bulb Camera typically involves a few steps. Here's a general guide to help you get started:
1. Choose the Right Bulb: First, make sure you have purchased
a Wi-Fi smart bulb camera. These bulbs usually come with built-in cameras and
Wi-Fi connectivity. Ensure it's compatible with your home Wi-Fi network and
smartphone.
2. Download the App: Most smart bulbs come with a companion
mobile app that you need to download. Search for the app associated with your
bulb camera in the Google Play Store (for Android) or the Apple App Store (for
iOS). Follow the instructions to download and install it on your smartphone.
3. Create an Account: Open the app and create an account
if required. This account will be used to manage your smart bulb camera and
access its features.
4. Turn Off Power: Before installing the smart bulb
camera, make sure the power to the light fixture is turned off at the breaker
or fuse box to avoid any electrical hazards.
5. Remove Existing Bulb: Unscrew the existing light bulb from
the fixture where you want to install the smart bulb camera. Make sure the
socket is clear and clean.
6. Install Smart Bulb Camera: Screw the smart bulb camera into the
light socket just like you would with a regular light bulb. Ensure it is
securely fitted.
7. Power On: Turn the power back on at the
breaker or fuse box.
8. Connect to Wi-Fi Network: Open the app on your smartphone and
follow the instructions to connect the smart bulb camera to your home Wi-Fi
network. Typically, this involves scanning a QR code on the bulb or entering
your Wi-Fi credentials in the app.
9. Configure Settings: Once the bulb is connected to your
Wi-Fi network, you can customize its settings using the app. This may include
adjusting the camera angle, setting up motion detection, configuring
notifications, etc.
10. Test: Test the smart bulb camera to ensure
it's working correctly. You should be able to view live video footage from the
camera through the app on your smartphone.
11. Mount if Necessary: If your smart bulb camera supports
mounting, you can use the provided hardware to securely attach it to the
desired location.
12. Final Adjustments: Make any final adjustments to the
camera angle or settings as needed to optimize its performance.
That's it! Your Wi-Fi smart bulb
camera should now be installed and ready to use. Remember to refer to
the specific instructions provided with your smart bulb camera for any additional
steps or troubleshooting tips.


0 Comments